Right now, digital corners are packed. Every day, countless folks upload clips – standing out takes more than just being different. Getting ahead comes down to strategy, never chance. That’s where TubeLab steps in, quietly shaping choices beneath the surface. Something sneaks through cracks most overlook. When patterns change quickly, it catches them early, ahead of the rush. Pieces built from its signals travel farther across platforms. Just steady analysis, grounded in real viewing habits.
Clear thinking leads the way with TubeLab – suddenly guesses fade, replaced by solid direction. Because choices grow stronger on actual data, not imagined facts. As steps forward come faster once doubts step aside. When certainty shows up, outcomes start making sense.

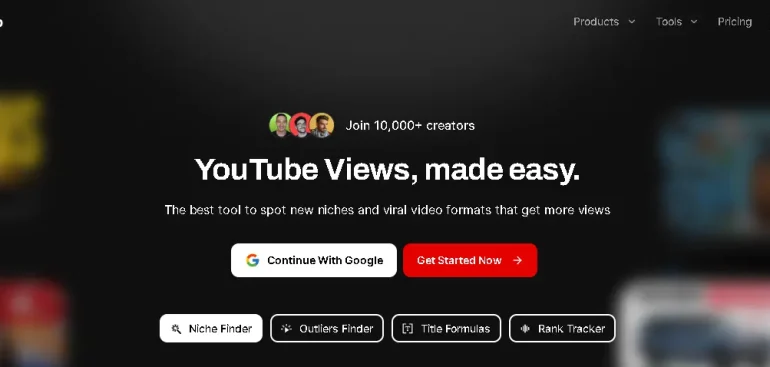
What is TubeLab?
Right off the bat, TubeLab arms creators with everything needed to shape a YouTube presence intentionally. Rather than relying on hunches, it points to popular subjects backed by real data. It highlights niches where interest is high but rivalry stays low. Over time, progress makes sense thanks to live performance updates. Fresh concepts emerge from current momentum, skipping outdated patterns. Hidden at first, this understanding now drives how things unfold. Step by step, progress follows quiet signals most overlook.
Imagine this instead:
spend minutes where you used to waste hours – TubeLab handles the search so your hands stay on the wheel. Not one video after another dragging you down rabbit holes, but answers appearing before the question fully forms. That moment of surprise when things click? Just code doing its job without fanfare. The clutter fades, not because magic happened, but because effort got redirected somewhere better.
TubeLab Key Features:
1. Niche Finder:
Inside TubeLab hides something meant to find overlooked pockets on YouTube. Rather than follow the pack, it turns attention to areas few have explored. Countless channels get scanned, revealing trends most overlook. That is where growth thrives – just beneath sight – when choices are sharp and timing clicks.
Starting off confused? That phrase actually guides beginners who feel stuck right from the start.
2. Outliers Finder:
Every now then, a video jumps far past the rest. While most clips drift by unseen, TubeLab spots these rare ones without delay. Something different happens when performance spikes sharply above normal. The system marks them right away – no waiting.
Watching these snippets lets creators spot what works. Then again, a few start copying pieces that suit their vibe. Pacing tweaks? Some grab those without thinking twice. Hooks hitting fast – others fixate on exactly that move. A small change here, once you see how things repeat. Every little thing pushes the outcome a bit further.

3. AI-Powered Idea Generation:
A blank screen shows up too much, doesn’t it? When ideas run thin, something shifts without noise. Artificial intelligence begins its quiet scan – pulling patterns from past success. It maps trails others carved across YouTube’s endless corridors. Picking paths others already walked changes how you share what you make. Sure, nothing promises a win – but leaning on what’s worked before shifts the balance just enough.
4. Title And Content Enhanced:
Off the bat, TubeLab hands over title examples built on how videos truly perform. Creators skip the guesswork by spotting differences in high-ranking clips. Its breakdown pulls quiet patterns into view – sharpening decisions quietly. Word choice, flow, when things drop – these details start lining up. Clues like these sharpen thumbnails while pushing headlines to stand out more. The outcomes change since the method leads the way.
5. Rank Tracking:
One day at a time, notice where your clips sit in the lineup – do they climb, dip, hold steady? Watch movement unfold across the field. How does each piece move when set beside the rest? See shifts happen, spot patterns form, track spots gained or lost.
Pieces fall into place when you watch closely, yet stumbles hint at shifts worth making. A different view often reveals what works – flaws whisper adjustments needed.

Tubelab helps creators make videos:
Finding your way without numbers is like walking in the dark. TubeLab changes that, bringing things into clear view. Where most overlook rising stars, it tracks each step taken on YouTube. Patterns start showing up long before others catch on. Time becomes an ally for creators, seeing change happen as it begins.
Energy shifts toward stronger videos once endless searching stops. When beginning or sticking to a schedule, TubeLab clears noise, shaping decisions quietly.
User Experience And Reviews:
Most folks find TubeLab clean without being empty, full of useful bits that actually work. Creators notice something right away – the ease of seeing what’s trending while watching video numbers shift.
Yet fact-checking yourself stays crucial, even when tools promise quick answers – each online aid has its dangers if trusted too soon. Some highlight drawbacks quietly, while others celebrate speed without pause.

TubeLab safety explained?
Looking again at TubeLab, it still seems solid when checked closely, with safety signs coming straight from reliable places. Moving around the web here feels safe, since every tool used to verify things gives a go-ahead signal. Tests done outside labs show nothing worrying, only repeated signs of stability. With each test passed, the sense grows stronger – browsers keep their guards relaxed, no alerts pop up. Confidence comes slowly, built on what can be seen instead of promises made.
With that thought hanging, anyone joining an online service should pause long enough to scan the rules, fees, and features tucked inside – simply to know. Even though hopping onto digital tools feels routine now, digging into specifics weighs heavier than many assume.
Conclusion:
Midway through your journey, real shifts begin. With TubeLab, progress isn’t random – it’s shaped by constant data feeds, clever pattern detection, behind-the-scenes analytics. Decisions shift from hunches to insights grounded in how people actually respond. Stuck one second? The next, direction comes straight from audience actions, not assumptions. What clicks becomes obvious, timing sharpens, momentum builds. Something stirs beneath what most overlook. A tiny change in attention shows itself long before it matters to anyone else. Moving like this skips clutter, hits harder. Speed finds you when work trails proof.
When solid steps replace guesses, progress shows. With care, TubeLab cuts empty effort, sharpens video quality, raises chances of standing out on YouTube.
Read More:- Infinix Note 60 Pro (5G): A Powerful Mid-Range Smartphone