

One tool—Notion—has emerged as the mainstay in the constantly changing realm of digital productivity. What began as a straightforward note-taking app has evolved into a robust multipurpose workspace that is ideal for handling everything from little assignments to extensive group projects.
Notion makes project management flexible, structured, and even enjoyable, regardless of whether you’re a student, freelancer, or employee of a developing company.
Even if you’re a total novice, we’ll show you how to utilize Notion for project management in this blog.
Why Manage Projects Using Notion?
What makes Notion unique is:
- Extremely adaptable (no one-size-fits-all)
- Excellent for both individuals and groups
- Integrates calendars, databases, tasks, and notes into one tool.
- Personal use is free, while team use is reasonably priced.
Additionally, it syncs instantaneously and functions on all devices.
Beginning to Use Notion
Step 1: Establish a New Page or Workspace
Click “Add a Page” on the sidebar after logging in. It should be called something like “Project Management” or “My Team Dashboard.”
A template or a blank page is your option; Notion provides pre-made templates for:
- Boards for Kanban
- Lists of tasks
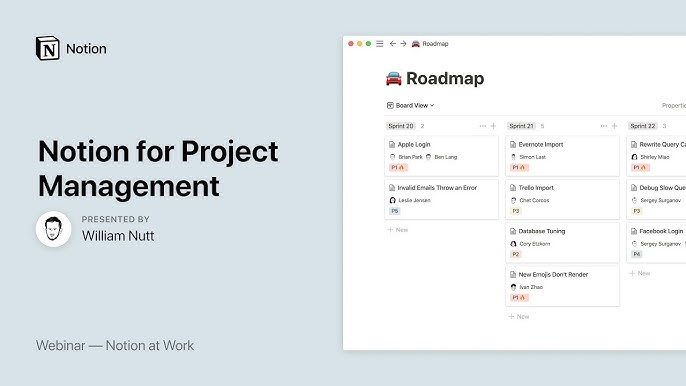
- Roadmaps
- Notes from the meeting
- Project monitoring tools
Step 2: Set Up Your Project Database
To create your project tracker in Notion, follow these steps:
Select “Table” or “Board” View.
- Table = spreadsheet format
- Board = Trello-like Kanban-style
Include the necessary columns (properties).
- Name of the Project
- Date of Due
- Assigned To
- Status (Completed, In Progress, To Do)
- Attachments or Notes
- Associated Activities (with relational databases)
Include Your Projects
- For every project or job, add rows or cards.
- Give them a status tag and set due dates.
Pro Tip: To improve visual clarity, use color-coded tags.
Step 3: Establish a Calendar View or Timeline
Use the following database view to improve time management:
- View all tasks by due date in the calendar view.
- Timeline View: Perfect for planning long-term projects (similar to Gantt charts)
This aids in identifying bottlenecks and visualizing your progress.
Step 4: Provide Links to Related Tasks or Pages
Notion enables you to link many databases or pages. For instance:
- Assign a project task to the meeting notes.
- Attach smaller tasks to a larger project.
This ensures that no information is lost by creating a web of interconnected data.
Step 5: Work Together With Your Group
Collaborating with others? Team members are invited to visit your page. You could:
- Utilize the “Person” property to assign assignments.
- Remark on the tasks
- Exchange files or updates.
- When tagging colleagues, use @mentions.
Everyone is literally on the same page thanks to real-time updates!

Step 6: Optimize & Automate
Elevate your project management skills:
- To save time when creating repeating tasks, use templates.
- Include checklists in your task cards.
- Make dashboards with integrated calendar, note, and task displays.
Even better, you can use tools like Zapier or Notion API to link Notion with Slack, GitHub, Google Calendar, and more.
Bonus Advice: Keep Things Simple and Clean
You can customize Notion indefinitely, but don’t go overboard.
- Begin with a simple design.
- Sort by deadline or priority.
- For readability, use headings and emojis.
- To cut down on clutter, archive finished tasks.
Concluding remarks
Notion is a personalized command center for all of your projects, not simply another project management application.
Notion keeps you accountable, organized, and stress-free whether you’re running a company-wide project, a side gig, or a group effort.