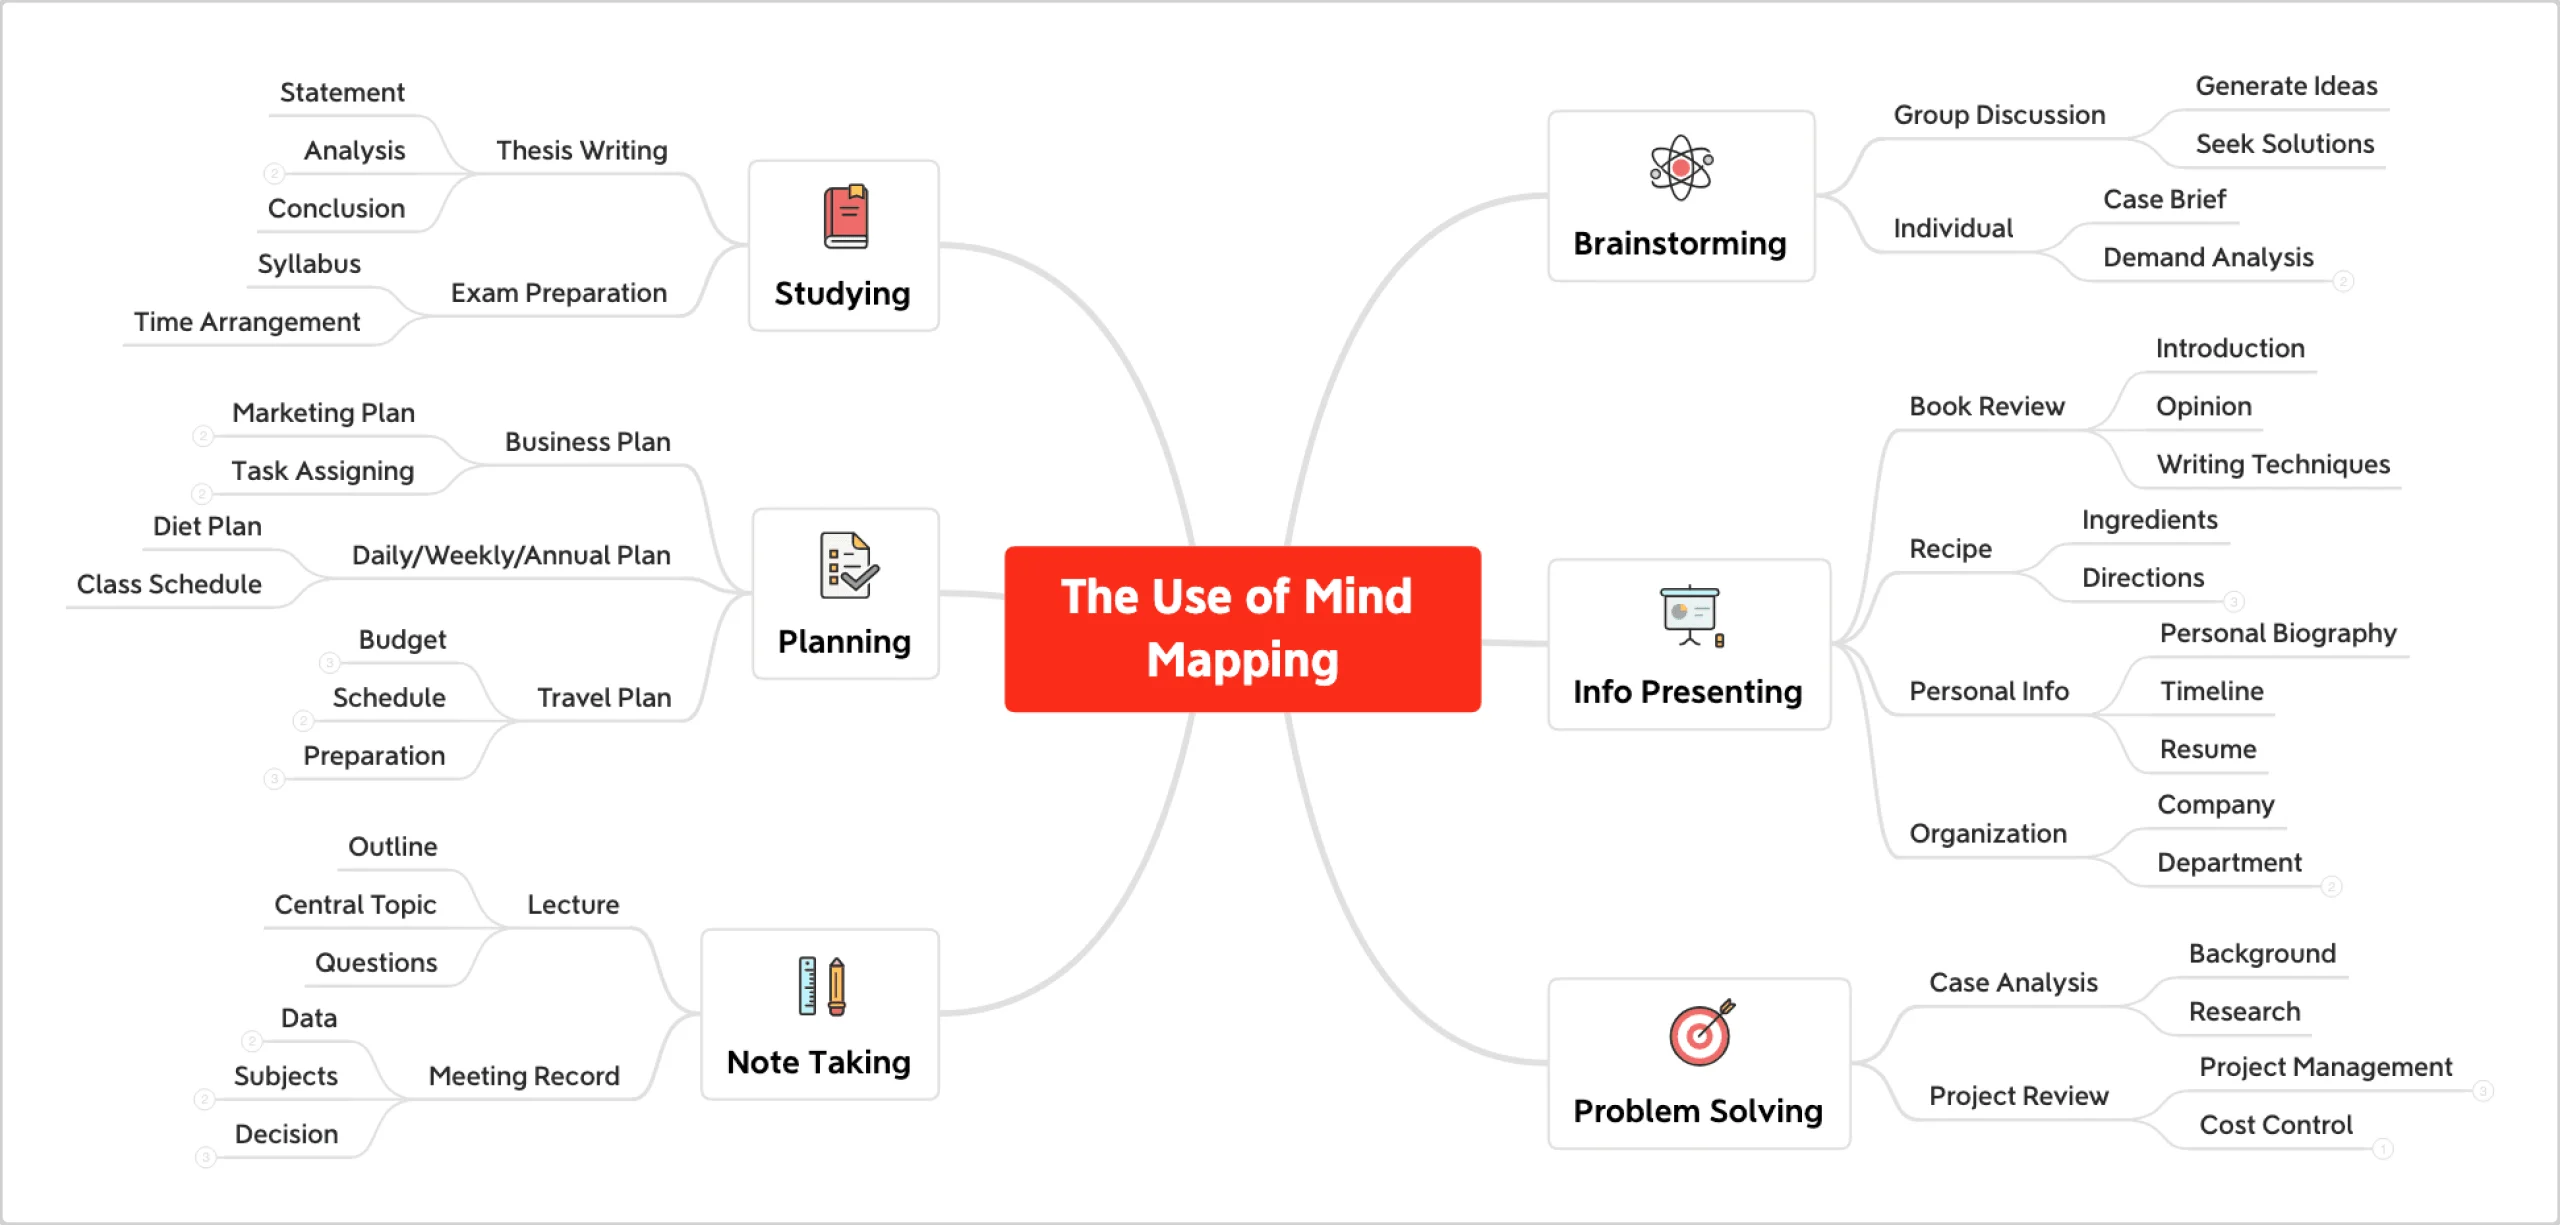
Beginner’s Guide to Mailchimp: Email Marketing Made Easy

You’ve undoubtedly heard of MailChimp if you’re new to email marketing. With good reason, it’s one of the most widely used platforms available. MailChimp provides a simple method for creating, sending, and managing email campaigns, regardless of whether you are a content producer, small business owner, or someone attempting to maintain a relationship with an audience. To get you started, this guide explains the fundamentals.

What is MailChimp?

Known for its email marketing solutions, MailChimp is a comprehensive marketing platform. However, it provides more than just email; it also has features like e-commerce connectors, automation, social media scheduling, and landing pages. Nevertheless, Mailchimp’s core competency remains email marketing.

What is MailChimp

Why Choose MailChimp?

  • User-friendly interface: MailChimp’s drag-and-drop editor and simple dashboard make things simple, even for non-techies.
  • There is a free plan available: The free plan, which is ideal for new users, permits up to 1,000 emails and 500 contacts per month.
  • Pre-made templates: Simply select a template and alter it to create stunning emails without needing to be a designer.
  • Automation tools: Easily set up re-engagement campaigns, birthday offers, and welcome emails.

Setting Up Your First Campaign

  1. Register for an account by going to Mailchimp.com. It just takes a few minutes and is an easy process.
  2. Include Your Viewers: Either manually enter email addresses or import your contacts from a spreadsheet. Use contacts who have consented to receive emails from you only.
  3. Create an Email: To add text, buttons, photos, and more, use the email builder’s drag-and-drop feature. You can see a preview of your email on a desktop computer and a mobile device.
  4. Launch Your Campaign: Decide on your target audience, write a subject line for your email, and choose the send time.
  5. Examine Your Results: Mailchimp provides you with an analysis of the campaign’s performance once it is launched. To help you write better emails in the future, you’ll see open rates, click rates, and more.

Tips for Better Email Marketing

  • Keep it simple: Each email should only have one clear message or objective.
  • Employ personalization: To make your emails seem more intimate, include the recipient’s first name.
  • Divide your list into segments: Different people require different messages. Make divisions according to behavior, hobbies, or geography.
  • Test before sending: To ensure that everything appears correct and that links function as intended, always send a test email to yourself.

Tips for Better Email Marketing

Final Thoughts

For those who are new to email marketing, Mailchimp is an excellent place to start. It’s simple to use, has a ton of useful features, and develops with your company. Mailchimp provides you all the resources you need to successfully send newsletters, advertise goods, or just keep in touch.

So go ahead and register, experiment, and begin cultivating those connections, one email at a time.

How to Build a Stunning Website on Squarespace: A Step-by-Step Guide

How to Build a Stunning Website on Squarespace: A Step-by-Step Guide

Without knowing a single bit of code, anyone can create a professional-looking website with Squarespace, which is known for its beautiful templates and user-friendly interface. If you’re ready to take your brand or personal project online, here’s a comprehensive step-by-step guide to help you build a stunning website using Squarespace. Creating a website can be overwhelming, especially if you’re not a tech expert.

Sign Up and Choose a Template

The first step is to register for a Squarespace account. Go to their website, enter your email address, and start a free trial. You’ll be asked to select a template after logging in. Squarespace has a large selection of expertly created templates that are appropriate for many uses, such as creating an online business, blog, or portfolio. Spend some time looking over the designs and pick one that best suits the objectives and personality of your company. Keep in mind that templates are only places to start; you can change everything later.

Sign Up and Choose a Template

Add Essential Pages to Structure Your Website

You can start adding pages in the site editor after selecting a template. Consider your website’s structure. A homepage, a about page, a services or portfolio page, a contact page, and occasionally a blog are all common features of websites. Every page has a function, so think about the information your visitors require and the actions you want them to perform. You only need to click a button in the Pages menu to add pages, and you can rearrange them or make subpages according to your tastes.

Customize the Design to Match Your Brand

It’s time to alter the look of your website after your pages are set up. Squarespace’s Style Editor simplifies this step. You can add your logo and alter the fonts, colors, and spacing. This is your opportunity to align your brand identity with the look of your website. To keep the entire website looking the same, stick to a consistent color scheme and font selection. Upload any creative designs or expertly taken pictures you have to give your website a polished appearance. Especially for novice builders, a simple, uncomplicated layout is frequently the most effective.

Customize the Design to Match Your Brand

Add Engaging Content and Optimize for SEO

The next step after creating your design is to fill each page with content. You may add text, photos, videos, buttons, and forms using the user-friendly drag-and-drop editor. Create readable and captivating language that outlines your brand, services, and contact information. Verify that your contact details are easily accessible and that any contact forms are functioning correctly. Think about making your website search engine friendly as you add content by using pertinent keywords and crafting insightful meta descriptions.

Preview and Optimize for Mobile Devices

Preview your website on various devices, particularly mobile ones, after the content is complete. Your layout must work effectively on smaller displays because the majority of visitors will be using their phones to browse your website. Although Squarespace’s templates are responsive to mobile devices, make sure to check for formatting errors and modify content blocks as necessary.

Preview and Optimize for Mobile Devices

Connect a Domain and Publish

Lastly, a domain name is required. Squarespace allows you to link an existing domain or register a new one instantly through their platform. Go ahead and publish your website once everything is in order and you are satisfied with the outcome. Congratulations! Your stunning new website is now operational.

NordVPN vs ExpressVPN: Which One Should You Trust in 2025?

NordVPN vs ExpressVPN

Choosing the perfect VPN in 2025 can be like choosing between two blockbuster hits: Both are excellent, but which one best suits your needs? If you’re deciding between NordVPN and ExpressVPN, you’re not alone. These two have been at the forefront of the VPN battle for years, and while they have some similarities, the distinctions are significant, depending on what you’re looking for.

Speed and Performance

Let’s begin with speed because no one wants a VPN that slows everything down. NordVPN has a significant advantage here because of its NordLynx protocol. It’s based on WireGuard and tuned for lightning-fast performance. Whether you’re streaming 4K, downloading huge files, or gaming online, it performs admirably. ExpressVPN uses its own Lightway protocol, and while it’s seamless and dependable, NordVPN is usually faster, especially when connecting to servers farther away.

Speed and Performance

Privacy and Security

NordVPN and ExpressVPN take data security very seriously. They use AES-256 encryption and have strong no-log standards. NordVPN goes above and beyond by offering features such as Double VPN, Onion over VPN, and Threat Protection, which actively prevents trackers and harmful websites. ExpressVPN keeps everything neat and simple, focused on performing the fundamentals exceptionally well. Both are headquartered in privacy-friendly jurisdictions—Panama for Nord and the British Virgin Islands for Express—so your data is secure and out of reach.

Streaming and Unblocking

If you want to unblock Netflix or stream BBC iPlayer from anywhere, any VPN is a fantastic choice. ExpressVPN is known for its high level of consistency when it comes to streaming. You rarely need to switch servers to find one that works. NordVPN also handles streaming effectively, though it does take some trial and error to find the ideal server. Once you’re in, the experience is seamless, with no buffering or pauses.

User Experience

ExpressVPN excels when it comes to simplicity. The app is simple, user-friendly, and does the job without making you think too much. It’s ideal for those who simply want to press a button and feel safe. NordVPN, on the other hand, has a more extensive feature set. Its UI is more complex, which is wonderful if you prefer having more control over your settings, but it may take some time to adjust if you’re new to VPNs.

User Experience

Pricing and Value

This is where NordVPN stands out for many people. It is more economical, especially if you commit to a longer-term plan. The company frequently offers promotions that provide additional months for free, making it a sound investment. ExpressVPN’s pricing is obviously on the expensive side. You spend a little more for a smoother experience but not necessarily for additional features.

Final Thoughts

Overall, NordVPN and ExpressVPN are excellent picks. If you’re looking for speed, advanced features, and better value for money, NordVPN is undoubtedly the superior option. However, if you like simplicity, consistency, and high-quality streaming performance, ExpressVPN will not disappoint. It depends on what is most important to you.